 Elasticsearch
# 一、Elasticsearch概述
# 1、简介
Elasticsearch 是一个实时的分布式存储、搜索、分析的引擎。提供了一个分布式的全文搜索引擎,基于restful web接口。
# 2、为什么使用
其实搜索这一项功能在数据库中我们经常使用,什么一些条件搜索呀,模糊搜索,那么Elasticsearch的搜索强在什么地方呢?
- 数据库的模糊查询是不走
索引的,不走索引意味着:只要你的数据库的量很大(1亿条),你的查询肯定会是秒级别的。 - 大家可以留意我们平时的游览器搜索,即使我们输入了错别的文字和字母,但是它依然能够返回我们想要的。
# 3、安装
windows下载:
下载地址:https://www.elastic.co/cn/downloads/past-releases#enterprise-search,下载完成之后直接运行bin目录下的
elasticsearch.bat,启动elasticsearch。Linux下载
推荐使用dokcer进行下载。
客户端工具
推荐直接使用官方Kibana。下载地址:https://www.elastic.co/cn/downloads/kibana,下载完成之后运行bin目录下的kibana.bat,启动Kibana的用户界面,访问http://localhost:5601/,即可打开用户界面。

在用户界面中点击Dev tools即可跳转到控制台,在控制台中输入对应的语句,即可执行。

# 二、集群状态查看
# 1、集群状态
GET /_cat/health?v

# 2、节点状态
GET /_cat/nodes?v

# 3、索引信息
GET /_cat/indices?v

# 三、索引操作
# 1、创建索引
PUT /customer
GET /_cat/indices?v

# 2、查看索引
GET shopping
服务端返回结果:
{
    "shopping": {//索引名
        "aliases": {},//别名
        "mappings": {},//映射
        "settings": {//设置
            "index": {//设置 - 索引
                "creation_date": "1617861426847",//设置 - 索引 - 创建时间
                "number_of_shards": "1",//设置 - 索引 - 主分片数量
                "number_of_replicas": "1",//设置 - 索引 - 主分片数量
                "uuid": "J0WlEhh4R7aDrfIc3AkwWQ",//设置 - 索引 - 主分片数量
                "version": {//设置 - 索引 - 主分片数量
                    "created": "7080099"
                },
                "provided_name": "shopping"//设置 - 索引 - 主分片数量
            }
        }
    }
}
# 3、删除索引
DELETE /customer
GET /_cat/indices?v

# 四、文档操作
# 1、添加文档
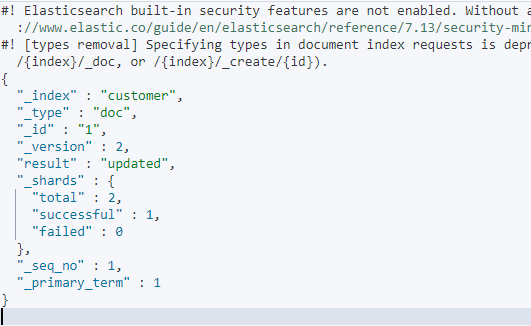
PUT /customer/doc/1
{
  "name":"wxx"
}

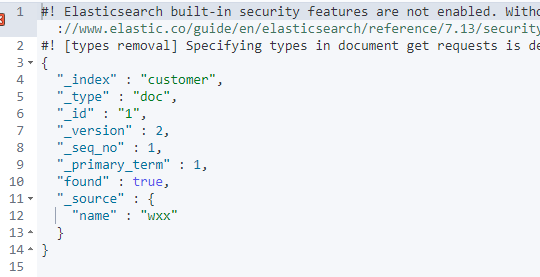
# 2、查看文档
GET /customer/doc/1

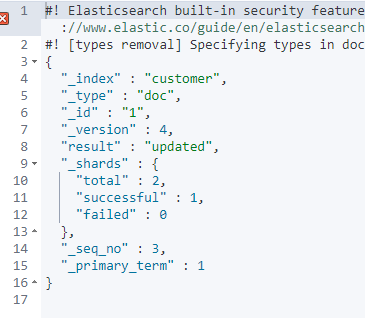
# 3、修改文档
POST /customer/doc/1/_update
{
  "doc":{"name":"wxx02"}
}

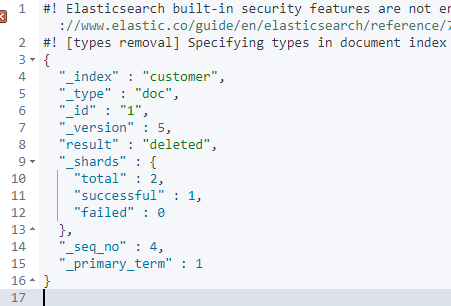
# 4、删除文档
DELETE /customer/doc/1

# 5、批量操作
POST /customer/doc/_bulk
{"index":{"_id":"1"}}
{"name": "John Doe" }
{"index":{"_id":"2"}}
{"name": "Jane Doe" }


# 六、文档复杂搜素
前面这些操作只是对Elasticsearch进行简单的熟悉,下面要进行一个核心的学习,就是把我们的数据放进去,然后对这些数据进行搜索。
# 1、数据准备
数据地址:https://github.com/macrozheng/mall-learning/blob/master/document/json/accounts.json
# 2、简单搜索
使用
match_all来进行全部搜索GET /bank/_search { "query": { "match_all": {} } }分页搜索,
from从那里开始,size多少个GET /bank/_search { "query": { "match_all": {} }, "from": 0, "size": 10 }搜索结果排序,使用
sort,这里是按照balance字段来进行降序。GET /bank/_search { "query": { "match_all": {} }, "sort": [ { "balance": { "order": "desc" } } ] }返回指定字段,我们返回两个需要的字段:
account_number,balanceGET /bank/_search { "query": { "match_all": {} }, "_source": ["account_number", "balance"] }
# 3、条件搜索
使用
match表示匹配条件,当match匹配数字的时候,是精准匹配。GET /bank/_search { "query": { "match": { "balance": 39225 } } }当
match匹配文字的时候,是模糊匹配,只要含有mill都会被匹配上。GET /bank/_search { "query": { "match": { "address": "mill" } } }使用
match_phrase进行短语匹配搜索。GET /bank/_search { "query": { "match_phrase":{ "address": "mill lane" } } }
# 4、组合搜索
使用
bool来进行组合,must表示同时满足。GET /bank/_search { "query": { "bool": { "must": [ { "match": { "address": "mill" } }, { "match": { "address": "lane" } } ] } } }should表示满足其中任意一个GET /bank/_search { "query": { "bool": { "should": [ { "match": { "address": "mill" } }, { "match": { "address": "lane" } } ] } } }must_not表示同时不满足GET /bank/_search { "query": { "bool": { "must_not": [ { "match": { "address": "mill" } }, { "match": { "address": "lane" } } ] } } }组合
must和must_not,age字段必须等于30,state字段不能包含IDGET /bank/_search { "query": { "bool": { "must": [ { "match": { "age": "30" } } ], "must_not": [ { "match": { "state": "ID" } } ] } } }
# 5、过滤搜索
搜索过滤,使用
filter来表示,这里是查询balance字段在一定范围之内的数据GET /bank/_search { "query": { "bool": { "must":{ "match_all": {} }, "filter": { "range": { "balance": { "gte": 20000, "lte": 30000 } } } } } }
# 七、SpringBoot整合
上述的操作,我们都是通过命令去简单熟悉了一下Elaticsearch的基本操作,现在我们将其与Springboot结合起来,去完成一个简单的CRUD的Demo。
# 1、依赖
        <!-- lombok -->
        <dependency>
            <groupId>org.projectlombok</groupId>
            <artifactId>lombok</artifactId>
            <optional>true</optional>
        </dependency>
        <!-- 测试 -->
        <dependency>
            <groupId>org.springframework.boot</groupId>
            <artifactId>spring-boot-starter-test</artifactId>
            <scope>test</scope>
        </dependency>
        <!-- 工具类 -->
        <dependency>
            <groupId>cn.hutool</groupId>
            <artifactId>hutool-all</artifactId>
            <version>5.7.16</version>
        </dependency>
        <!-- elasticsearch -->
        <dependency>
            <groupId>org.springframework.boot</groupId>
            <artifactId>spring-boot-starter-data-elasticsearch</artifactId>
            <version>2.5.1</version>
        </dependency>
        <dependency>
            <groupId>junit</groupId>
            <artifactId>junit</artifactId>
            <version>4.13.1</version>
            <scope>test</scope>
        </dependency>
# 2、配置
spring:
  elasticsearch:
    uris: 127.0.0.1:9200
  data:
    elasticsearch:
      repositories:
        enabled: true
# 3、实体类
@Data
@Builder
@NoArgsConstructor
@AllArgsConstructor
@Document(indexName = "person_index")
public class Person implements Serializable {

    private static final long serialVersionUID = 8510634155374943623L;

    /**
     * 主键
     */
    private Long id;

    /**
     * 名字
     */
    private String name;

    /**
     * 国家
     */
    private String country;

    /**
     * 年龄
     */
    private Integer age;

    /**
     * 生日
     */
    private Date birthday;

    /**
     * 介绍
     */
    private String remark;
}
这里我们添加了一个注解@Document(indexName = "person_index"),表示现在我这个实体是存放到person_index这个索引下。
# 4、服务层
public interface PersonService extends ElasticsearchRepository<Person, Long> {
     /**
     * 通过姓名模糊查询
     * @param keyword
     * @return
     */
    List<Person> findByNameLike(String keyword);

    /**
     * 自定义查询
     * @param keyword
     * @return
     */
    @Query("{\"match_phrase\":{\"name\":\"?0\"}}")
    List<Person> findByNameCustom(String keyword);
}
这边看到还是和JPA的方式很类似。
# 5、相关操作
在测试类中添加:
@Autowired
private PersonService personService;

@Autowired
private ElasticsearchRestTemplate elasticsearchRestTemplate;
开始进行我们后续的操作。
创建索引
    @Test
    public void createIndex() {
        String indexName = "person_index";
        IndexOperations indexOperations = elasticsearchRestTemplate.indexOps(IndexCoordinates.of(indexName));
        if (indexOperations.exists()) {
            log.info("索引已经存在");
            return;
        }
        indexOperations.create();
        log.info("索引创建成功");
    }
删除索引
    @Test
    public void deleteIndex() {
        String indexName = "person_index";
        IndexOperations indexOperations = elasticsearchRestTemplate.indexOps(IndexCoordinates.of(indexName));
        indexOperations.delete();
    }
添加文档
    @Test
    public void insert() {
        List<Person> list = new ArrayList<>();
        list.add(Person.builder().age(11).birthday(new Date()).country("CN").id(1L).name("001").remark("test1").build());
        list.add(Person.builder().age(22).birthday(new Date()).country("US").id(2L).name("002").remark("test2").build());
        list.add(Person.builder().age(33).birthday(new Date()).country("ID").id(3L).name("003").remark("test3").build());
        personService.saveAll(list);
    }
更新文档
更新的直接直接利用保持去覆盖即可:
    @Test
    public void update() {
        personService.save(Person.builder().age(22).birthday(new Date()).country("CN").id(2L).name("002").remark("test2").build());
    }
删除文档
@Test
public void delete() {
    personService.deleteById(1L);
}
查询文档
全部查询
    @Test
    public void searchList() {
        Iterable<Person> all = personService.findAll();
        all.forEach(person -> log.info(person.toString()));
    }
模糊查询
        // 模糊查询
        Iterable<Person> all = personService.findByNameLike("00");
        all.forEach(person -> log.info(person.toString()));
自定义查询
        // 自定义查询
        List<Person> byNameCustom = personService.findByNameCustom("003");
        for (Person person : byNameCustom) {
            log.info(person.toString());
        }
分页查询
        // 分页查询
        Page<Person> all = personService.findAll(PageRequest.of(1, 1));
        all.forEach(person -> log.info(person.toString()));
查询结果排序
        // 结果排序
        Iterable<Person> age = personService.findAll(Sort.by(Sort.Direction.DESC, "age"));
        age.forEach(person -> log.info(person.toString()));
# 参考
https://juejin.cn/post/6844904117580595214#heading-0
https://juejin.cn/post/6844904126321524744#heading-1
https://juejin.cn/post/6844904051994263559#heading-1
https://github.com/xkcoding/spring-boot-demo/tree/master/demo-elasticsearch-rest-high-level-client
